
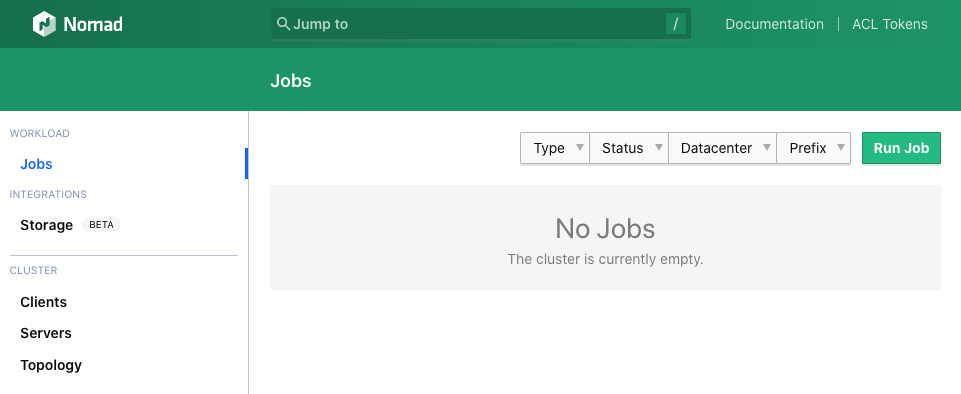
Whilst looking for a platform to host some small projects, I recently took HashiCorp Nomad for a spin in my homelab. This is a brief run-through of my setup and a guide on getting started with a small but flexible Nomad installation. To be clear, this is not an immediately scalable, production ready setup – if there is such a thing – but may help lay the foundation for something that works for your project. In the interest of full disclosure, at the time of writing this article, I am employed by HashiCorp in a team working on a different product, however I received no direction during my experimentation nor on the content of this writeup.
Nomad is “a simple and flexible workload orchestrator” that is capable of running not just containers, but pretty much any workload you can build. Whilst related solutions like Kubernetes focus on containerized application hosting, Nomad has a broader reach and this might be a great selling point if your environment is more heterogenous, or if you are looking for something more lightweight and with a gradual learning curve. With that said, let’s take a closer look at what Nomad actually looks like.
Written in Go, Nomad is distributed as a single binary for multiple platforms. Official builds are provided for Windows, Linux and macOS, so you can get started on your own workstation right away. Here I’ve focused on running Nomad on Linux, with a basic configuration to get you to a fully functioning single node cluster. Nomad works hand-in-hand with HashiCorp Consul, a platform independent networking solution with built-in service discovery, although we’ll only touch on the latter featureset. In stark contrast to competing solutions, it is ridiculously simple to get started with Nomad.
Installing on Ubuntu
We can install Nomad from the Linux repository provided by HashiCorp. Since we’ll be deploying a containerized application, we will also install Docker at the same time.
Make sure we have prerequisite tools:
apt install apt-transport-https ca-certificates curlAdd the following to your apt sources, substituting the arch and release to match your host. See this post for supported platforms.
deb [arch=amd64] https://apt.releases.hashicorp.com focal main
deb [arch=amd64] https://download.docker.com/linux/ubuntu focal stable
Also trust the gpg signing keys:
curl -fsSL https://apt.releases.hashicorp.com/gpg | sudo apt-key add -
curl -fsSL https://download.docker.com/linux/ubuntu/gpg | sudo apt-key add -
Install Nomad and Docker CE.
apt update
apt install nomad docker-ce docker-ce-cli containerd.io
At this point you should be able to start Nomad by running nomad agent -config /etc/nomad.d and access the web UI at http://localhost:4646/ui/. Right now, you can submit jobs to your Nomad instance and they will run. Hit ctrl-c to terminate the process. That was easy!
Running as a service
Assuming you are using systemd, configuring Nomad to run at boot is straightforward. Place the following unit file at /etc/systemd/system/nomad.service and run systemctl daemon-reload to pick it up.
[Unit]
Description="HashiCorp Nomad"
Documentation=https://nomadproject.io/docs/
Wants=network-online.target
After=network-online.target

[Service]
ExecReload=/bin/kill -HUP $MAINPID
ExecStart=/usr/bin/nomad agent -config /etc/nomad.d
KillMode=process
KillSignal=SIGINT
LimitNOFILE=infinity
LimitNPROC=infinity
Restart=on-failure
RestartSec=2
StartLimitBurst=3
StartLimitIntervalSec=10
TasksMax=infinity

[Install]
WantedBy=multi-user.target
To run Nomad right away, use systemctl start nomad and to enable it at boot-time, run systemctl enable nomad.
Configuration
So far we haven’t actually configured anything, since the Debian package ships with a default configuration suitable for a single agent deployment. We’ll add some options to personalize our setup. The default configuration is at /etc/nomad.d/nomad.hcl and you can customize this to suit your needs.
datacenter = "lab1"
data_dir   = "/opt/nomad/data"
bind_addr  = "0.0.0.0"

server {
  enabled          = true
  bootstrap_expect = 1
}

client {
  enabled = true
  servers = ["127.0.0.1:4646"]

  host_volume "certs" {
    path      = "/etc/letsencrypt/live"
    read_only = true
  }

  host_volume "registry" {
    path      = "/opt/registry/data"
    read_only = false
  }
}
We’ve specified a datacenter name, which you’ll use in your jobs to describe where they should run, and we’ve added two host volumes – one for injecting our TLS certificates and the other for storing image layers for the container registry service we’ll be deploying.
Make sure to pre-create these directories before restarting Nomad to apply this configuration, as it will fail to start if any of them are not found, then use systemctl restart nomad.
Consul
We are going to use Consul to provide service publishing and discovery services for our Nomad agent. Assuming the apt repository is configured as above, just install it.
apt install consulUnlike Nomad, Consul doesn’t ship with a working server configuration and requires a small amount of configuration to get going with a simple single-agent setup. Place the following in /etc/consul.d/consul.hcl.
datacenter  = "lab1"
data_dir    = "/opt/consul"
client_addr = "0.0.0.0"
ui          = true
server      = true
encrypt     = "..."

bootstrap_expect = 1
For the value of encrypt, you should provide a base64-encoded 32-byte random key, which you can generate using openssl.
openssl rand -base64 32Let’s try running Consul to verify the configuration. When starting Consul, if more than one network is detected, you are required to specify which one it should bind to. Since we installed Docker earlier, your system will now have multiple networks configured. Determine your local network address and pass it as the -bind argument.
sudo -H -u consul consul agent -bind 1.2.3.4 -config-dir=/etc/consul.dAt this point, you should be able to access the Consul UI at http://127.0.0.1:8500/ui/.
Since Nomad and Consul are running on the same host, Nomad should begin communicating with Consul right away. You can verify this by looking for the nomad and nomad-client service registrations in the Consul UI.

We’ll configure systemd to also run Consul at boot. Hit ctrl-c to quit the Consul process, and then save the following systemd unit file at /etc/systemd/system/consul.service.
[Unit]
Description="HashiCorp Consul"
Documentation=https://www.consul.io/
Requires=network-online.target
After=network-online.target

[Service]
Type=notify
User=consul
Group=consul
ExecStart=/usr/bin/consul agent -bind 1.2.3.4 -config-dir=/etc/consul.d/
ExecReload=/bin/kill --signal HUP $MAINPID
KillMode=process
KillSignal=SIGTERM
Restart=on-failure
LimitNOFILE=65536

[Install]
WantedBy=multi-user.target
Be sure to substitute your network address for the -bind argument. Also, unless you ran Consul earlier as the consul user, you should reset the file permissions in the Consul data directory (chown -R consul:consul /opt/consul).
Run systemctl daemon-reload, systemctl enable consul and systemctl start consul to start Consul and run it at boot time.
Load balancing
Before deploying any services, we are going to need a load balancer to predictably expose our services to the network and perform TLS offloading. Note that whilst it’s perfectly possible to expose static ports which route directly to deployed services, using a load balancer will tidy things up nicely and means that we don’t have to manually assign (and remember) port numbers for anything we choose to deploy.
Unlike say, Kubernetes, Nomad doesn’t expose primitives specifically for load balancing. This makes our setup really simple; all we need is to deploy a suitable HTTP server as a service. We are able to configure it to automagically discover the services we deploy.
We are going to use HAProxy. Whilst it doesn’t have fully native support for service discovery via Consul, we can use some templating magic to build and maintain our configuration file. It needs to be told about each service, but it can inspect DNS SRV lookups to decide how to route requests.
Create the following job file and save it as haproxy.nomad. It’s quite long but we’ll break it down.
job "haproxy" {
  datacenters = ["lab1"]
  type        = "service"

  group "haproxy" {
    count = 1

    network {
      port "http" {
        static = 80
      }

      port "https" {
        static = 443
      }

      port "haproxy_ui" {
        static = 1936
      }
    }

    service {
      name = "haproxy"
      tags = [
        "http",
      ]

      check {
        name     = "alive"
        type     = "tcp"
        port     = "http"
        interval = "10s"
        timeout  = "2s"
      }

      check {
        name     = "alive"
        type     = "tcp"
        port     = "https"
        interval = "10s"
        timeout  = "5s"
      }
    }

    task "haproxy" {
      driver = "docker"

      config {
        image        = "haproxy:2.0"
        network_mode = "host"

        volumes = [
          "local/haproxy.cfg:/usr/local/etc/haproxy/haproxy.cfg",
        ]
      }

      template {
        destination = "local/haproxy.cfg"
        change_mode = "restart"
        data        = <<EOF
global
   tune.ssl.default-dh-param 2048

defaults
   mode http
   timeout connect 5000
   timeout check 5000
   timeout client 30000
   timeout server 30000

frontend stats
   bind *:1936
   stats uri /
   stats show-legends
   no log

frontend http_front
   bind *:{{ env "NOMAD_PORT_http" }}
   bind *:{{ env "NOMAD_PORT_https" }} ssl crt /local/tls/example.net/combined.pem
   http-request set-header X-Forwarded-Proto https if { ssl_fc }
   http-request redirect scheme https unless { ssl_fc }
{{ range $tag, $services := services | byTag }}{{ if eq $tag "proxy" }}{{ range $service := $services }}{{ if ne .Name "haproxy" }}
   acl host_{{ .Name }} hdr(host) -i {{ .Name }}.example.net
   use_backend {{ .Name }} if host_{{ .Name }}
{{ end }}{{ end }}{{ end }}{{ end }}

{{ range $tag, $services := services | byTag }}{{ if eq $tag "proxy" }}{{ range $service := $services }}{{ if ne .Name "haproxy" }}
backend {{ .Name }}
    balance roundrobin
    server-template {{ .Name }} 10 _{{ .Name }}._tcp.service.consul resolvers consul resolve-opts allow-dup-ip resolve-prefer ipv4 check
{{ end }}{{ end }}{{ end }}{{ end }}

resolvers consul
   nameserver consul 127.0.0.1:8600
   accepted_payload_size 8192
   hold valid 5s

EOF
      }

      resources {
        cpu    = 200
        memory = 128
      }

      volume_mount {
        volume      = "certs"
        destination = "/local/tls"
        read_only   = true
      }
    }

    volume "certs" {
      type      = "host"
      read_only = true
      source    = "certs"
    }
  }
}
It should hopefully be clear what we’re trying to accomplish with the network {} block. We are exposing 3 static ports – 80 and 443 for general traffic, and 1936 for viewing HAProxy stats. Port labels are arbitrary so you can customize these, just be sure to reference the same port name elsewhere in your job spec.
The service {} block is where Consul comes in. This will register a service called haproxy with Consul, along with two health checks. Consul evaluates the health checks to detemine whether our haproxy service is working, although we haven’t yet defined any actions for it to take in the event that it is not.
The task {} block is the core of our job. It tells Nomad how to run our job and what resources it should allocate. In the config {} block, we’re using the haproxy:2.0 image (unqualified image references are pulled from Docker Hub), and we have mapped our configuration file. The resources {} block should also be self explanatory – cpu is measured in MHz and memory in MB.
The volume {} block and it’s relative volume_mount {} are used here for mounting the directory we configured earlier in Nomad’s main configuration file for injecting certificates for TLS offloading. You can acquire a wildcard certificate from Let’s Encrypt or you can supply a self signed certificate. Importantly, HAProxy requires a “combined” file consisting of the RSA private key, the issued certificate, and any intermediary certificates, concatenated in that order. More on that below.
HAProxy configuration template
The template {} block in the above configuration is evaluated by Nomad when creating the allocation for our task, and is automagically updated during the lifetime of the job. The change_mode attribute tells Nomad to restart the task in the event the resulting configuration changes, which is useful because we want our load balancer to detect newly launched services.
Inside the template, we use some useful patterns to help standardize our configuration. Of note is the NOMAD_PORT_x set of environment variables, where x refers to the port name configured in the network {} block. This ensures that if the port changes, so do the contents of the corresponding environment variable, which are then injected into our HAProxy config file, and it helps prevent drift and misconfiguration. This is especially useful when not using static ports, as we’ll discover later when we deploy additional services.
The range and if constructs inside the template evaluate the list of services made available by Consul, and we use this to express the frontend and backend configuration for HAProxy. Note that we have made an assumption here about DNS conventions, specifically that each service will be registered in DNS in the form servicename.example.net, and this convention will be used for routing requests based on the HTTP Host header. Registering these DNS names is out of scope here, but if you’re testing locally you can simply add these to your local hosts file as you go along.
Note the if eq $tag "proxy" condition inside each of these template blocks. This ensure that we only configure HAProxy for services registered with the proxy tag, giving us fine grained control over which services we want to load balance. Without this, or a similar condition, this template would render configuration for every service in Consul, including Nomad itself, with lacklustre results.
Submitting the job
With the above job spec saved in a file haproxy.nomad, submitting the job to Nomad is a single command.
nomad job run haproxy.nomadYou should see something similar to:
==> Monitoring evaluation "f677b146"
    Evaluation triggered by job "haproxy"
==> Monitoring evaluation "f677b146"
    Evaluation within deployment: "34b4f287"
    Allocation "94f580bf" created: node "377c1f84", group "haproxy"
    Evaluation status changed: "pending" -> "complete"
==> Evaluation "f677b146" finished with status "complete"
and if you look in the Nomad web UI, you should see your job now running. Click on the job to inspect it – you can see the current allocation which should have a status of “running” and if you click on the allocation, you should see live graphs of the resource utilizations, and a list of the assigned ports.
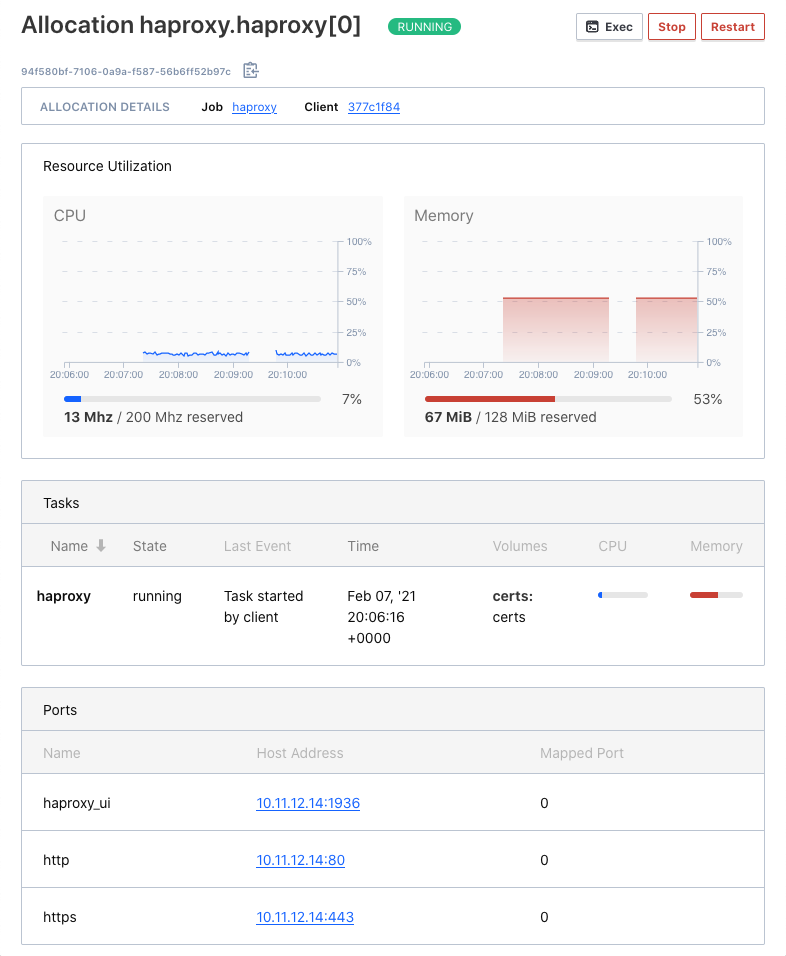
You should also see the corresponding service for this job in the Consul UI.
So far so good, but we really want to run some services! You can go ahead and deploy any job you wish, but if you want a completely self-contained setup let’s first deploy a container registry.
Container Registry
As we will be deploying containerized applications to our single-node cluster, we are going to need somewhere to store container images. You could use Docker Hub, GitHub, or one of the many cloud registries, but we’ll stay local and install our own registry service. Docker publishes a registry application that works great for our purposes, so we’ll use that. We are going to keep things simple and install it from Docker Hub, just as we did with HAProxy.
Create the following job configuration and save it as registry.nomad.
job "registry" {
  datacenters = ["lab1"]
  type        = "service"

  group "registry" {
    count = 1

    network {
      port "http" {
        to = 5000
      }
    }

    service {
      name = "registry"
      port = "http"
      tags = [
        "http",
        "proxy",
      ]

      check {
        type     = "http"
        path     = "/"
        interval = "10s"
        timeout  = "2s"
      }
    }

    task "registry" {
      driver = "docker"

      config {
        image = "registry:2"
        ports = ["http"]
      }

      resources {
        cpu    = 500
        memory = 512
      }

      volume_mount {
        volume      = "registry"
        destination = "/var/lib/registry"
        read_only   = false
      }
    }

    volume "registry" {
      type      = "host"
      read_only = false
      source    = "registry"
    }
  }
}
Compared to our HAProxy job spec, this is simpler, and uses some of the same patterns. We have a single volume mount for storing image layers, which helps with persistence in the event our task is stopped or restarted. Our port definition is different – here we are not using a static port allocation, but we are routing it to a static port inside the container for convenience. We also register a service with Consul, and this time we are adding the proxy tag so that the registry service is itself exposed by our load balancer. Although we only have a single instance, this gives us ready-made TLS and a predictable hostname we can address.
Run this job using:
nomad job run registry.nomadJust as with HAProxy, the allocation ID should be returned and you will see the job running in Nomad, and the service registration in Consul. The service registration should have the specified tags http and proxy. Inspecting the HAProxy configuration should now show the newly launched registry service configured with a backend and frontend. To view the configuration, first find the current allocation ID for the haproxy task and you can locate the generated file in the Nomad data directory.
cat /opt/nomad/data/alloc/e12c507a-7a3d-d140-1705-e38fa1355c1b/haproxy/local/haproxy.cfgIt should look something like this:
...

frontend http_front
   bind *:80
   bind *:443 ssl crt /local/tls/example.net/combined.pem
   http-request set-header X-Forwarded-Proto https if { ssl_fc }
   http-request redirect scheme https unless { ssl_fc }

   acl host_registry hdr(host) -i registry.example.net
   use_backend registry if host_registry


backend registry
    balance roundrobin
    server-template registry 10 _registry._tcp.service.consul resolvers consul resolve-opts allow-dup-ip resolve-prefer ipv4 check

...
At this point, you’ll want to either create a DNS record or add an entry to your hosts file. Go ahead and test it by hitting it with curl.
curl -ik -H 'Host: registry.example.net' https://localhost/If you get a 200 OK response, your registry and load balancer are working!
Deploying a service
Now, we have everything we need to build and deploy our own services. You can pick any application you like; you may even have a project ready and waiting. However, to keep things simple, we can deploy an HTTP echo service provided by HashiCorp. It’s written in Go, and it’s trivial to compile in a container. We’ll clone the repository, build a container image, push it to our registry, and deploy it as a job with Nomad!
Clone the github.com/hashicorp/http-echo repository and save the following Dockerfile to the same directory.
FROM golang:1.15
RUN mkdir /app
ADD . /app
WORKDIR /app
RUN test -f go.mod || go mod init github.com/hashicorp/http-echo
RUN go build -o http-echo .

FROM alpine:latest
RUN apk --no-cache add libc6-compat
COPY --from=0 /app/http-echo /bin/http-echo
ENTRYPOINT ["/bin/http-echo"]
This is a two-stage container build, using the golang image to compile the application, and the alpine image in the final build. Build the container, tag it and push it to your registry.
docker build . -t http-echo
docker tag http-echo registry.example.net/http-echo
docker push registry.example.net/http-echo
All being well, you should see the following as your image is sent to the registry service.
Using default tag: latest
The push refers to repository [registry.example.net/http-echo]
a1f80ad402a6: Pushed
a9d9a72b590d: Pushed
1119ff37d4a9: Pushed
latest: digest: sha256:f8cfedcd96d4403d097927ea2acb5eeff229d856d4ad50711845e710bdacd01a size: 947
The container image is now saved in your registry and you can deploy a job to Nomad. Use the following job spec, saved in echo.nomad.
job "echo" {
  datacenters = ["lab1"]
  type        = "service"

  group "echo" {
    count = 1

    network {
      port "http" {}
    }

    service {
      name = "echo"
      port = "http"
      tags = [
        "http",
        "proxy",
      ]

      check {
        type     = "http"
        path     = "/"
        interval = "10s"
        timeout  = "2s"
      }
    }

    task "server" {
      driver = "docker"

      config {
        image = "registry.example.net/http-echo:latest"
        args  = [
          "-listen", ":${NOMAD_PORT_http}",
          "-text", "Echo service listening on port ${NOMAD_PORT_http}",
        ]
        ports = ["http"]
      }

      resources {
        cpu    = 100
        memory = 64
      }
    }
  }
}
Now submit the job to Nomad.
nomad job run echo.nomadAssuming the job was accepted, and the task was allocated, you’ll see it appear in the Nomad UI. Go ahead and create a DNS record for this service now, or add it to your hosts file.
In the Nomad UI, click into the job, and again into the allocation, to see the assigned ports. You’ll notice that since we didn’t specify a static port, a random available port was assigned by Nomad and populated in the NOMAD_PORT_http environment variable, which we used in our task block to configure the service. This port was also used when publishing the service to Consul.

Meanwhile, the HAProxy config template consumed the service registration details from Consul and configured our load balancer with the correct port for this service. This workflow obviates the responsibility of tracking port numbers for services, so we can simply deploy new services and almost immediately access them via our load balancer using a friendly hostname. Try it!
curl -i https://echo.example.net/HTTP/1.1 200 OK
x-app-name:
x-app-version: 0.2.4
date: Sun, 07 Feb 2021 21:18:48 GMT
content-length: 37
content-type: text/plain; charset=utf-8
Echo service listening on port 31192Our echo service is running and load balanced. We can deploy as many services as we have resources for, and enjoy the transparent orchestration provided by Nomad.
Nomad isn’t just for web services, it’s capable of running nearly any workload you care to throw at it, from scheduled jobs (there’s a job scheduler type for that) to JVM applications, and even KVM virtual machines. Despite being lightweight, the combination of Nomad and Consul is extremely powerful, and we have only looked at a small set of features. I strongly suggest that if you choose to take this setup to production, that you consider important measures such as adding more agents, using different nodes for the clients and server, access control using ACLs, firewall and network security considerations (e.g. using a backplane network for cluster communications), shipping your logs, and monitoring & alerting.
References
Whilst learning about Nomad, I found these great resources for which I am thankful and recommend you check out.
- HashiCorp Nomad – From Zero to WOW by Russ Parsloe
- Getting started with Nomad by Archana Balasundaram
- The Getting Started series on HashiCorp Learn
- The Official Nomad documentation